Discover how to pick the hydration pack that meets your thirst for adventure with our expert tips on finding the perfect balance of comfort, capacity, and convenience!
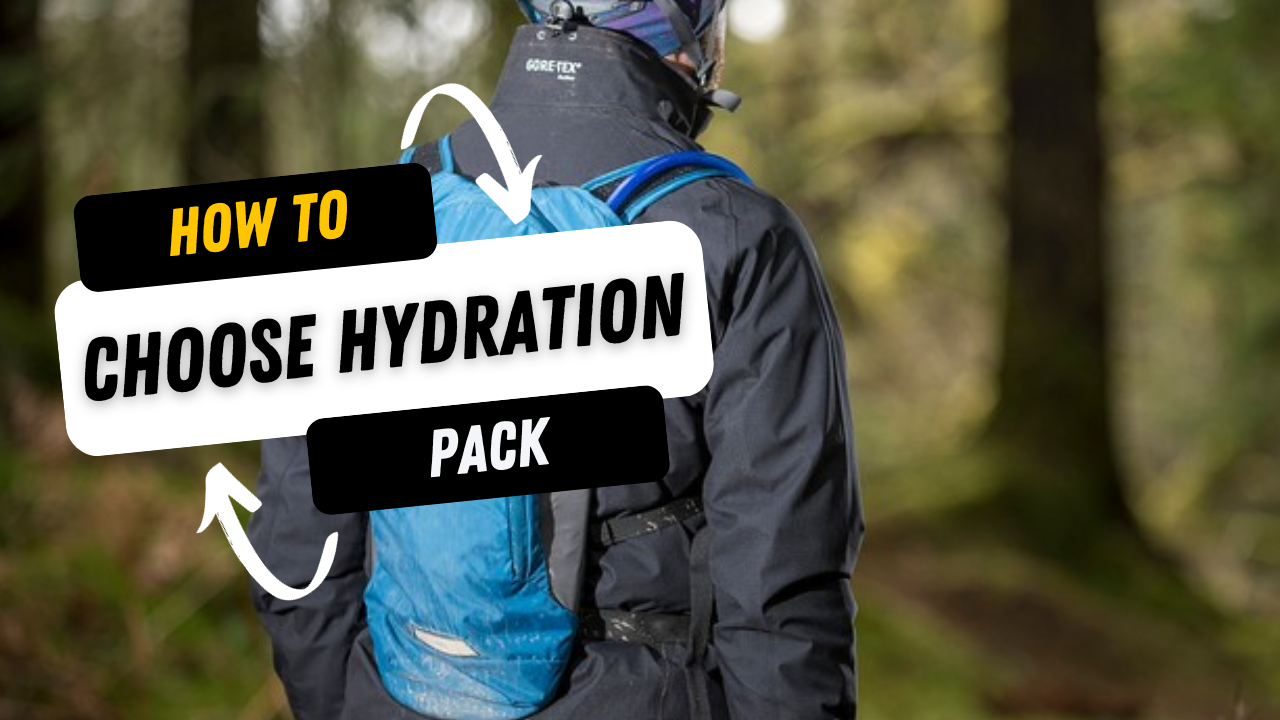
Choosing the right hydration pack for your outdoor adventures is as crucial as selecting the right pair of boots. The ideal pack melds seamlessly with your activities, providing convenient hydration without slowing you down or throwing you off balance.
Whether you're an avid hiker, a mountain biker, a trail runner, or a snowboarder, your hydration needs can vary greatly, and with the myriad options available in the market, the decision can be overwhelming.
In this comprehensive guide, we will delve into the essential factors you need to consider when selecting a hydration pack that best suits your needs.
From reservoir size and pack capacity to fit and comfort, we'll cover all the details that will help you stay quenched without compromising on performance or enjoyment. So strap in, and let's take the first step towards choosing your perfect hydration companion.
1) Determine The Use

Determining the use of a hydration pack is the most critical step because it dictates the design, size, and features you'll need. Here's an expanded view of what to consider under "Determine the Use":
- Running:
- Trail Running: If you're hitting the trails, look for a hydration pack that is compact and hugs the body to prevent bouncing. The capacity can be on the smaller side (1-2 liters) if you'll be out for just a few hours.
- Road Running: Runners on roads or tracks may want ultra-lightweight packs with minimal water capacity to avoid unnecessary weight, as refill opportunities might be more frequent.
- Cycling:
- Mountain Biking: For rugged terrain, choose a pack that's durable and has a secure fit to keep it from shifting. The water capacity should be sufficient for your ride, and some extra space for repair kits and snacks might be necessary.
- Road Biking: Aerodynamics and weight are more important for road cyclists. Hydration packs with a low profile that can fit under a jersey are preferred, and bladder capacity should align with the distance and climate.
- Hiking:
- Day Hikes: A moderate-capacity hydration pack (2-3 liters) with additional storage for food, a light jacket, and safety gear is usually adequate.
- Extended Hikes: For longer treks, consider a larger hydration pack that can carry more water and has enough space for extra clothing, food, and possibly a hydration filter for refilling in the wilderness.
- Adventure Racing/Multi-sport:
- These activities often require a blend of cycling, running, and sometimes paddling. A versatile hydration pack with a mid-range water capacity, good durability, and ample storage for gear transitions is ideal.
- Some adventure races have specific gear requirements, so make sure your pack can accommodate all the mandatory equipment.
- Climbing:
- Climbers need a pack that's slim and won't get in the way during ascents. It should also have a secure fit to keep it from swinging and potentially throwing off balance.
- Skiing/Snowboarding:
- Insulation is key to prevent the water from freezing. Look for packs with insulated reservoirs and drink tubes.
- A streamlined design that fits under a jacket can be beneficial to shield the pack from the elements.
- Commuting:
- If you're using the hydration pack while commuting, consider one that has space for work essentials like a laptop and documents, along with reflective elements for visibility in traffic.
- Kids:
- For younger users, consider smaller, lighter packs with safety features and ease of use. The pack should fit properly to avoid discomfort or injury.
In each of these uses, the importance of water capacity, storage space, fit, comfort, and additional features can significantly vary. Customizing the hydration pack to the activity will ensure it enhances the experience rather than detracts from it. It's also wise to consider the climate and environment—hot, humid conditions may require more water, while cooler climates may demand less. And for those venturing into areas without easy access to clean water, a pack that can integrate a water filter or purifier might be crucial.
2) Capacity
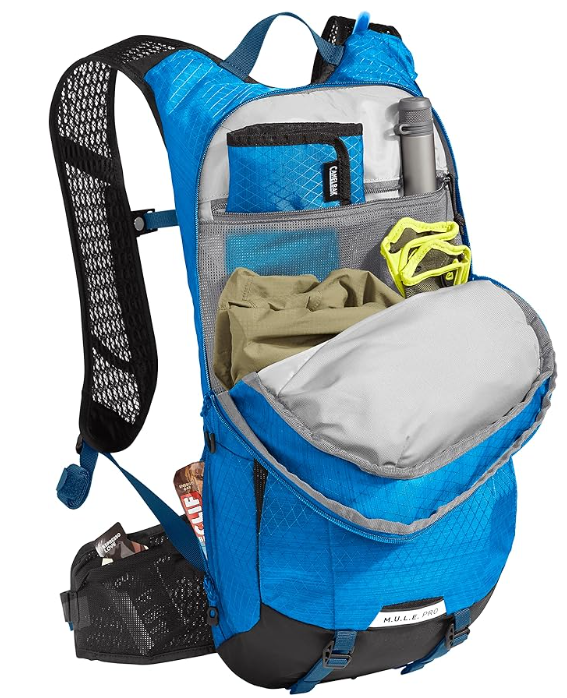
When talking about the capacity of a hydration pack, it's essential to differentiate between two main aspects: the water capacity, which is the volume of liquid the pack's reservoir can hold, and the cargo capacity, which refers to how much gear, food, and other essentials the pack can carry. Here's a more detailed look into both:
Water Capacity:
- 1 to 1.5 Liters (34 to 50 ounces):
- Best For: Short runs, road cycling, and low-intensity activities where you'll have access to water sources to refill as needed, or for activities in cooler climates where less hydration is required.
- Considerations: These are lightweight and cause minimal disruption to movement but require more frequent refills.
- 2 Liters (about 68 ounces):
- Best For: The most common size for a variety of activities including day hiking, mountain biking, and skiing. It balances the need for sufficient hydration with a desire not to carry excess weight.
- Considerations: It's a versatile size but consider your hydration needs against the duration of your activity and the availability of refill points.
- 3 Liters (100 ounces):
- Best For: Longer excursions such as full-day hikes, backcountry skiing, or any prolonged activity in hot and dry conditions where water sources are scarce.
- Considerations: Larger reservoirs add weight and can shift the center of gravity in your pack, so ensure the pack design manages this well.
Cargo Capacity:
- Minimal (up to 5 liters):
- Best For: Fast and light activities where you need to carry very little besides water — perhaps a few energy bars, your keys, and a phone.
- Considerations: There's not much room for extra layers or equipment, so these packs are best for short, fast outings or when you know you won't face variable conditions.
- Moderate (5 to 10 liters):
- Best For: Day hikes, trail runs, and mountain bike rides where you need to carry extra food, a layer or two, and perhaps a compact first aid kit or a headlamp.
- Considerations: These packs strike a good balance between carrying capacity and size, but they may not have enough space for gear-intensive activities.
- Large (10 to 20+ liters):
- Best For: All-day adventures, winter sports where extra clothing is needed, or when you must carry additional gear like climbing equipment, camera gear, or a more comprehensive safety kit.
- Considerations: These larger packs can feel bulky and may be overkill for simpler or shorter activities. It’s also important to consider that the more space you have, the more you may be tempted to fill it, adding to the pack weight.
When considering capacity, think critically about the amount of water and gear you realistically need. Overestimating can lead to unnecessary weight, which could slow you down and make your activity less enjoyable. Underestimating, especially with water in high-heat or remote settings, can be dangerous. It's a balance that each individual needs to find based on their own needs, the nature of the activity, the environment they'll be in, and their comfort with carrying weight.
Also, remember that the total weight of a full hydration pack includes both the water and the cargo. Water weighs approximately 1 kilogram per liter (about 2.2 pounds per liter), so a full 3-liter reservoir adds about 3 kilograms (6.6 pounds) before any gear is added. It's vital to consider this when determining the size of the pack you'll be comfortable carrying.
3) Fit
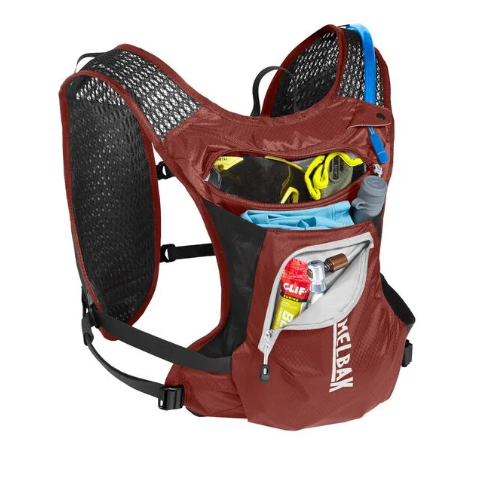
Ensuring a proper fit for your hydration pack is crucial for comfort, efficiency, and even safety during your activities. Here's a more detailed look at the factors to consider:
1. Torso Length:
- Measurement: Your torso length, not your height, determines your pack size. To measure, find the C7 vertebra (the bony bump at the base of your neck) and the iliac crest (the top of your hip bones). Measure the distance between these two points.
- Pack Sizing: Many packs come in multiple sizes or with adjustable suspension systems to fit various torso lengths. Ensure the pack aligns well with your measurement.
2. Waist Size:
- Importance: Most of the pack's weight should rest on your hips, not your shoulders. A well-fitting hip belt is crucial, especially for larger packs.
- Adjustment: Hip belts should snugly wrap around your iliac crest. Many are adjustable, but it's essential to try them on, as the padding and structure can feel different across models and brands.
3. Chest Size:
- Chest Straps: These help stabilize the load and prevent the shoulder straps from moving too much. They are particularly important in activities with a lot of upper body movement, like running.
- Fit for Women: Women-specific hydration packs have chest straps and shoulder straps that accommodate the bust, often with a design that avoids discomfort around the chest area.
4. Overall Fit:
- Shoulder Straps: They should contour comfortably around your shoulders, neither too tight nor too loose. There shouldn't be any gap between your shoulders and the straps.
- Back Panel: It should sit flush against your back. Some packs come with various back lengths or adjustable back systems for a more custom fit.
- Movement Test: If possible, try the pack on with some weight in it and mimic the movements of your activity. The pack should stay stable and not shift excessively.
5. Comfort Features:
- Padding: Look for sufficient padding on the shoulder straps and hip belt to prevent chafing and discomfort during prolonged use.
- Ventilation: Many packs feature a mesh back panel or ventilation channels to improve airflow and reduce sweat build-up.
6. Load Distribution:
- Balance: A well-fitted pack distributes weight evenly across your body. Too much load on the shoulders or hips can cause discomfort and fatigue.
- Adjustment: Learn how to adjust the load lifters, sternum strap, and hip belt to balance the weight properly.
7. Special Considerations:
- Children and Petite Frames: Look for packs specifically designed for smaller frames. These often have shorter torso lengths and narrower shoulder and hip belts.
- Extra Features: Some packs offer additional fit adjustments like removable hip belts, adjustable torso lengths, and customizable shoulder straps.
8. Try Before You Buy:
- Testing: If possible, test different packs in a store. Walk around with the pack loaded to assess comfort and fit. Online shopping might offer more variety, but make sure there's a good return policy if the fit isn't right.
Proper fit not only adds to comfort but can also prevent injuries and ensure that you're not unnecessarily fatigued by your pack. This is particularly important for activities that require endurance or navigating challenging terrain. Remember, the best pack is the one you don’t notice you’re wearing.
4) Design Features
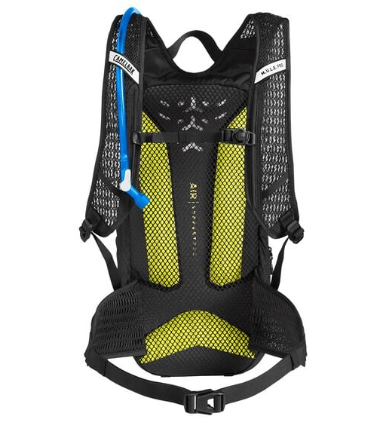
Design features in hydration packs vary widely and are often specialized for specific activities. Understanding these features will help you choose a pack that best suits your needs. Here's an expansion on some key design features:
1. Reservoir Design:
- Opening Type: Some reservoirs have a wide mouth, which makes them easier to fill and clean. Others have a screw-top or fold-top opening.
- Bite Valve: The design of the bite valve affects the flow rate of water. Some valves have an on-off switch to prevent leaks.
- Quick-Release Tubes: Handy for easily refilling the reservoir without unthreading the tube through the pack.
2. Pack Material:
- Durability: Heavier materials are more durable, which is crucial for activities like mountain biking or rock climbing.
- Weight: Lighter materials are ideal for running and hiking to keep the pack weight down.
- Water Resistance: Waterproof or water-resistant materials are essential in wet climates or for water sports.
3. External Attachments:
- Tool Loops and Gear Loops: Useful for carrying extra equipment like trekking poles, ice axes, or helmets.
- Bungee Cords or External Straps: For attaching layers of clothing or other quick-access items.
4. Pockets and Compartments:
- Organization: Multiple pockets help in organizing gear, snacks, and smaller items. Some packs have special compartments for phones, keys, or sunglasses.
- Accessibility: Consider how easy it is to access these pockets while on the move.
5. Fit and Adjustability:
- Adjustable Straps: To fine-tune fit around the chest, waist, and shoulders.
- Women’s and Kids’ Models: Designed to fit different body shapes better than unisex models.
6. Back Panel Design:
- Ventilation: Some packs have a suspended mesh back panel to promote airflow and reduce sweat build-up.
- Padding: Adequate padding enhances comfort but can also add to the pack’s weight.
7. Reflective Elements and Safety Features:
- Visibility: Important for road runners and cyclists, reflective materials or attachments for lights help with visibility in low light.
- Whistle or Emergency Features: Some packs include built-in safety features like a whistle on the chest strap.
8. Hydration Hose Routing:
- Left or Right Shoulder: This depends on personal preference; some packs allow routing the hose on either side or down the middle.
9. Insulation:
- For activities in colder environments, insulated hydration sleeves and tubes prevent water from freezing.
10. Weight Distribution:
- Low-Center of Gravity Packs: For biking or running, packs that hold water lower on the back can improve balance and stability.
11. Color and Style:
- While functionality is key, the color and style of the pack can be important for visibility, heat management (darker colors absorb more heat), or simply personal preference.
When choosing a hydration pack, consider the types of activities you'll be doing most frequently. A pack well-suited for hiking might not be the best for cycling, and vice versa. Pay attention to the specific features that will make your experience more comfortable and efficient.
5) Hydration Mechanism
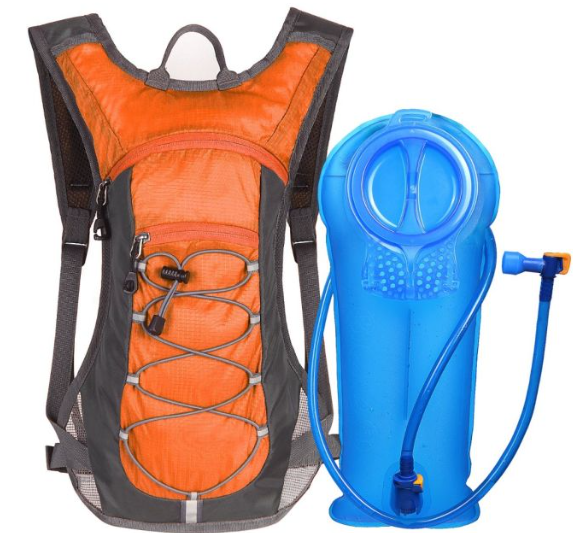
The hydration mechanism in a hydration pack primarily refers to the reservoir (also known as a bladder), the hose, and the bite valve system. These components work together to provide a convenient and efficient way to hydrate while on the move. Here's a more detailed look at each part:
1. Reservoir (Bladder):
- Capacity: Typically ranging from 1 to 3 liters, it's the main storage for the water you'll carry.
- Material: Usually made from durable, flexible plastics that are BPA-free and often antimicrobial to prevent bacteria growth.
- Shape and Design: Some are wider and flatter to sit comfortably against the back; others are more elongated. The design can affect how the water feels when carried (center of gravity, balance, etc.).
- Opening: Can be a screw cap, a wide mouth, or a fold-over and slide clip. Wide-mouth designs are easier to fill and clean.
- Maintenance: They need to be cleaned regularly to prevent mold and bacteria buildup. Some come with cleaning kits or are easier to turn inside out for cleaning.
2. Hose:
- Length and Diameter: Must be long enough to reach your mouth comfortably from the backpack. The diameter can affect the flow rate of the water.
- Routing: Can often be routed through either shoulder strap, depending on user preference. Some packs have clips or magnets on the straps to secure the hose when not in use.
- Insulation: In cold conditions, an insulated hose prevents the water from freezing.
3. Bite Valve:
- Design: Requires you to bite down lightly to open the valve and drink, and it closes when not in use to prevent leaking.
- Flow Rate: Some bite valves are designed for higher flow rates, which can be beneficial during high-intensity activities.
- Locking Mechanism: Many have a twist or switch lock to prevent leaks when not in use or during transport.
- Replacement: Bite valves can wear out or get dirty and are often replaceable.
4. Additional Features:
- Quick-Release Mechanisms: Allow for easy detachment of the hose from the reservoir for refilling without needing to reroute the hose.
- Taste-Free Materials: Some reservoirs and hoses are made with special materials to prevent any plastic taste in the water.
- Inline Filters: Some hydration systems include or offer compatibility with inline water filters for purifying water from natural sources on the go.
5. Hydration Pack Integration:
- Access Ports: Packs often have dedicated ports for the hydration hose, designed to keep the reservoir sealed and secure while allowing easy access to the hose.
- Internal Sleeves and Clips: These help keep the reservoir upright and in place, preventing it from sloshing around or sinking to the bottom of the pack.
Understanding the hydration mechanism is crucial for choosing the right hydration pack. Depending on your activity, you might prioritize ease of cleaning, ease of drinking (like a higher flow rate for intense activities), or insulation for cold environments. The convenience of staying hydrated without stopping or removing the pack is a significant benefit of these systems, especially for endurance athletes, hikers, and bikers. Regular maintenance, such as cleaning and drying the reservoir and hose, is essential to keep the system safe and functional.
6) Material and Durability
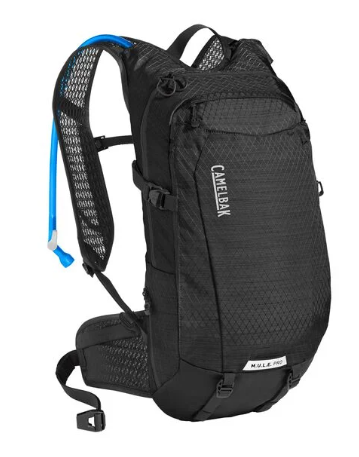
When it comes to hydration packs, the material and durability are key factors that affect the pack's lifespan, weight, and suitability for different activities. Here's an expanded look into these aspects:
1. Material Types:
- Nylon and Polyester: These are the most common materials used in hydration packs. Nylon is typically more durable and abrasion-resistant, making it suitable for rougher activities like mountain biking or rock climbing. Polyester is lighter and often used in packs designed for running or light hiking.
- Ripstop Fabrics: Some hydration packs are made with ripstop nylon or polyester, which includes a reinforced grid pattern to prevent tears from spreading. This is particularly useful for outdoor activities where the pack might snag on branches or rocks.
- Mesh: Used in areas that require ventilation, such as back panels and shoulder straps. Mesh improves air circulation, reducing sweat and increasing comfort.
2. Durability Considerations:
- Denier (D): This is a measure of the fiber thickness and thus the durability of the material. Higher denier fabrics are tougher and more abrasion-resistant but also heavier. For instance, a 70D nylon is lighter and less durable than a 210D nylon.
- Water Resistance and Waterproofing: While most hydration packs are not fully waterproof, many are made with water-resistant materials. Some may have a water-repellent coating (like DWR - Durable Water Repellent) that helps water bead up and roll off the surface. For activities in wet environments, look for packs with higher water resistance or consider using a rain cover.
3. Seams and Stitching:
- Reinforced Seams: Areas that bear more stress, like shoulder strap attachments and zippers, often have reinforced stitching for added durability.
- Seam Taping: In higher-end or water-resistant packs, seams may be taped to prevent water from seeping in.
4. Zippers and Fasteners:
- Quality of Zippers: Heavy-duty zippers are less likely to break or jam. Some packs feature weatherproof or covered zippers for added protection against moisture and dirt.
- Buckles and Straps: Durable packs have high-quality plastic or metal buckles and robust straps that can withstand regular adjustments and strain.
5. Weight vs. Durability Trade-off:
- Lightweight Materials: Ideal for running, cycling, or when you need to minimize pack weight. However, these materials may be less durable and not suitable for heavy-duty use.
- Heavier, Tougher Materials: Best for activities like rock climbing or mountain biking, where the pack is more likely to encounter rough handling.
6. UV Resistance and Color Fading:
- Materials exposed to sunlight for extended periods can degrade or fade. Some materials are treated for UV resistance, which is important for activities like desert hiking or cycling.
7. Eco-Friendly and Sustainable Options:
- With growing environmental concerns, some manufacturers offer packs made from recycled materials or with eco-friendly manufacturing processes.
8. Maintenance and Care:
- Cleaning and Storage: Proper care can significantly extend the life of a hydration pack. Cleaning the pack according to manufacturer instructions and storing it in a dry, cool place can prevent damage and wear.
When selecting a hydration pack, balance the need for durability with the type of activity you plan to do and the weight you're comfortable carrying. A more rugged, heavy-duty pack might be overkill for a casual day hike, while a super-light pack might not withstand the rigors of aggressive mountain biking.
7) Comfort
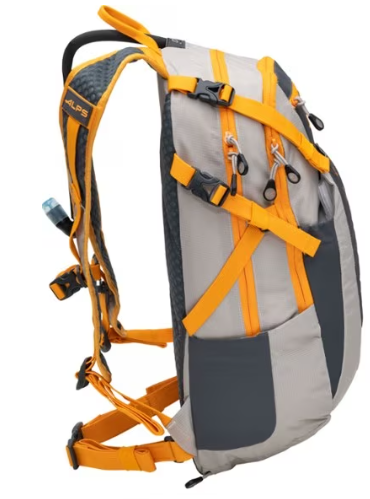
Comfort is a critical factor in choosing a hydration pack, as it directly impacts your experience during activities like hiking, running, biking, or any outdoor adventure. A comfortable hydration pack should feel like a natural extension of your body, without causing strain, fatigue, or discomfort. Here are key aspects to consider for comfort:
1. Fit and Adjustability:
- Size and Torso Length: Packs come in different sizes, and some are specifically designed for different torso lengths. A proper fit ensures the weight is evenly distributed and the pack sits comfortably on your back.
- Adjustable Straps: Look for adjustable shoulder, chest, and waist straps. This allows you to customize the fit according to your body shape and the layers of clothing you're wearing.
- Women-Specific and Kids’ Designs: These are shaped differently to fit the contours of a woman's or child’s body, often with narrower shoulder widths and tailored hip belts.
2. Weight Distribution:
- A well-designed hydration pack distributes weight evenly to avoid putting too much pressure on any one part of your body. The heaviest items should be packed closest to your back.
3. Padding:
- Shoulder Straps and Back Panel: Adequate padding on the shoulder straps and back panel can significantly increase comfort, especially when carrying heavier loads. However, too much padding can add bulk and reduce ventilation.
- Hip Belts: For larger packs, hip belts help distribute the weight off your shoulders and onto your hips, which is crucial for long-duration activities.
4. Ventilation:
- Breathable Materials: Mesh panels and breathable fabrics help reduce sweating and keep you cool.
- Suspended Mesh Back Panels: Some packs have a tension-mesh suspension system that creates an air space between your back and the pack, enhancing airflow and reducing sweat.
5. Stability:
- Low-Profile and Snug Fit: Especially important for activities like running or mountain biking, where too much movement of the pack can be distracting or uncomfortable.
- Compression Straps: These help to cinch down the load and keep it stable, preventing the contents from shifting while you're moving.
6. Hydration System:
- Ease of Drinking: A hydration pack should allow you to drink effortlessly without having to stop your activity. The placement of the hose and bite valve, and the ease of drawing water, are crucial for comfort.
7. Load Capacity:
- Right Sizing: Choosing a pack with the appropriate capacity for your activity ensures you’re not carrying more pack than you need. Overpacking can lead to discomfort.
8. Material Against Skin:
- Non-Chafing Fabric: Ensure the fabric that comes in direct contact with your skin is soft and non-chafing. Rough materials can cause irritation, especially over longer distances.
9. Ergonomic Design:
- Contouring: Some packs are designed to follow the natural curves of your back or hips, making them more comfortable to wear for extended periods.
10. Personal Trial:
- Fitting and Testing: The best way to ensure comfort is to try on different packs. Adjust the straps, load some weight, and move around to get a feel for how the pack fits and moves with your body.
Remember, what works for one person might not work for another, so personal preference and fit are key. Comfort in a hydration pack is not just about how it feels when you first put it on, but how it supports and performs during your entire activity.
8) Ease of Cleaning

Ease of cleaning is an important aspect to consider when choosing a hydration pack, as regular cleaning is essential for maintaining hygiene and ensuring the longevity of the pack. A hydration pack that is easy to clean will save you time and effort, and it helps in preventing the growth of mold and bacteria, especially inside the reservoir (bladder) and the drinking hose. Here are key factors to consider regarding ease of cleaning:
1. Reservoir Design:
- Wide Mouth Openings: A wider opening allows for easier access to the interior of the reservoir. It makes it simpler to clean the inside surfaces and corners, either by hand or with a brush.
- Removable Parts: Reservoirs where the hose, bite valve, and other components can be easily detached allow for more thorough cleaning.
- Turn Inside Out: Some reservoirs are designed to be reversible, enabling better drying and cleaning of the interior surfaces.
- Material: Reservoirs made from smoother materials are generally easier to clean as they are less likely to harbor residues and bacteria.
2. Hose and Bite Valve:
- Detachable Hoses: Hoses that can be easily disconnected from the reservoir are easier to clean and dry.
- Cleaning Brushes: Specialized long, flexible brushes are available for cleaning the inside of the hose.
- Easy-to-Clean Bite Valves: Bite valves should be detachable and made of materials that are easy to clean without retaining tastes or odors.
3. Drying Aids:
- Reservoir Hangers: Some packs come with or are compatible with hangers, which hold the reservoir open for air drying.
- Hose Clips: Allowing you to hang the hose for drying can prevent moisture buildup inside.
4. Pack Material:
- Machine Washable: Some packs are made from materials that can be safely machine washed, making it easier to clean the pack itself.
- Durable, Easy-to-Clean Fabrics: Look for materials that can be easily wiped down or don’t easily absorb dirt and sweat.
5. Simplicity and Accessibility:
- Fewer Compartments and Creases: Packs with a simpler design are generally easier to clean as there are fewer places for dirt and moisture to hide.
- Accessible Bladder Compartment: The easier it is to remove and replace the bladder, the more likely you are to clean it regularly.
6. Antimicrobial Treatments:
- Reservoirs with Antimicrobial Properties: Some bladders are treated with antimicrobial agents to inhibit the growth of bacteria and mold, which can make cleaning less frequent or intensive.
7. Maintenance Kits:
- Cleaning Kits: Some hydration packs come with or have compatible cleaning kits, including reservoir brushes, hose brushes, and drying aids.
8. Instructions and Ease of Disassembly:
- Clear Cleaning Instructions: Good hydration packs come with clear instructions on how to best clean and maintain the pack and its components.
- Intuitive Disassembly: Components that can be disassembled and reassembled intuitively and without tools are preferable for ease of cleaning.
Regular cleaning is vital for hygiene, especially if you use energy drinks or other liquids besides water in your hydration pack. Choosing a pack that simplifies this process can make a significant difference in the overall user experience and ensure the longevity and performance of the pack.
9) Additional Features
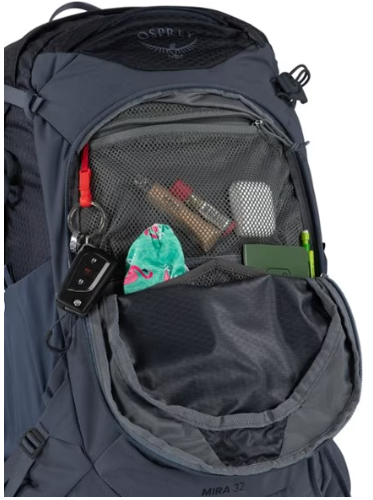
Additional features in hydration packs can enhance functionality, convenience, and safety. While the core purpose of a hydration pack is to carry water and make drinking convenient while on the move, these extra features can significantly improve your experience. Here’s an expanded look at some additional features you might find in hydration packs:
1. Reflective Elements:
- For safety during low-light conditions, reflective strips or patches can make you more visible to others, especially important for road runners and cyclists.
2. Built-in Whistle:
- Some hydration packs include a whistle, often integrated into the sternum strap buckle, which can be a vital safety tool in emergency situations or if you get lost.
3. Quick-Release Valves:
- These allow you to quickly disconnect the hose from the bladder, which is convenient for refilling the bladder without having to reroute the hose through the pack.
4. Insulated Tubes and Reservoirs:
- To prevent water from freezing in colder weather, some hydration systems come with insulated tubes and bladders.
5. Magnetic Clips for Tube Positioning:
- These clips can be attached to your shirt or the pack’s strap, keeping the drinking hose in place and easily accessible while you move.
6. Bite Valve Covers:
- Covers protect the bite valve from dirt and debris, which is particularly useful in environments where cleanliness is a concern (like mountain biking or dusty trails).
7. Compartments for Tools and Pumps:
- For cyclists or adventurers, specific compartments designed to hold tools, tire pumps, or other essential gear can be incredibly useful.
8. Integrated Rain Cover:
- Some packs come with a built-in or detachable rain cover to protect your gear and the pack itself in wet conditions.
9. Hydration Bladder Compatibility:
- Not all packs come with a bladder included. Some are designed to be compatible with various types and sizes of hydration bladders, offering flexibility in choosing your hydration system.
10. Expandable Pockets or Cargo Area:
- For longer trips where you need to carry more gear, expandable pockets can increase the pack’s capacity.
11. External Bungee Straps or Loops:
- Useful for attaching additional items on the outside of the pack, like a jacket or a helmet.
12. Solar Panels:
- Some high-tech hydration packs come with integrated solar panels for charging devices like smartphones or GPS units.
13. Hydration Tracker or Monitor:
- Advanced hydration packs might include technology to track and monitor your hydration levels, reminding you to drink at regular intervals.
14. Color and Design Varieties:
- A wide range of colors and designs can suit personal preferences and uses. High-visibility colors are great for safety, while camouflage or neutral colors might be preferred for activities like hunting or birdwatching.
15. Eco-Friendly Materials:
- Some brands focus on sustainability, offering packs made from recycled materials or employing eco-conscious manufacturing processes.
16. Custom Fit Adjustments:
- Features like adjustable back panels or interchangeable hip belts for a more custom and comfortable fit.
These additional features can cater to specific needs and preferences, making the hydration pack more than just a water-carrying device. When choosing a hydration pack, consider which of these features align with your activities and needs. Remember, while extra features can be beneficial, they also add to the weight and complexity of the pack, so it’s a balance between utility and simplicity.
10) Budget

Budget considerations are crucial when choosing a hydration pack, as prices can vary significantly based on brand, features, capacity, and material quality. Your budget should align with how often you plan to use the pack, the intensity of your activities, and the specific features you need. Here’s a breakdown of what you might expect across different budget ranges:
1. Entry-Level (Low Budget):
- Price Range: Often under $50.
- Characteristics: Basic functionality, lower capacity, fewer features, and potentially less durable materials. Suitable for occasional use or for those new to an activity.
- Brands: More generic or less-known brands. Some well-known brands might have entry-level options.
- Considerations: While economical, these might not endure heavy use or offer the comfort and convenience of higher-end models.
2. Mid-Range:
- Price Range: Between $50 to $150.
- Characteristics: Good quality materials, better durability, and more features like better bladder systems, comfortable straps, and moderate storage capacity.
- Brands: Well-known brands in the outdoor and sports market often have their most popular models in this range.
- Considerations: These packs are usually sufficient for most users, balancing quality and cost. Ideal for regular hikers, cyclists, and runners.
3. High-End (Premium):
- Price Range: $150 and above, sometimes much higher.
- Characteristics: High-quality materials, superior durability, advanced features (like hydration monitoring, better ventilation systems, and ergonomic design), and often a brand premium.
- Brands: Top outdoor and sports brands, often with a focus on specific activities like ultra-running, mountain biking, or long-distance hiking.
- Considerations: For frequent, intense users or professionals. The high cost can be justified by the durability, advanced features, and improved comfort.
Additional Considerations:
Purpose and Frequency of Use:
- If you're using the pack for occasional short hikes or runs, a lower-budget option might suffice.
- For regular or intense activities, investing in a higher-quality pack can improve comfort and durability, making it more cost-effective in the long run.
Seasonal Sales and Discounts:
- Look out for sales during off-seasons or holiday discounts. Previous year models can be significantly cheaper when new models are released.
Online Reviews and Recommendations:
- Research and read reviews to ensure the pack you’re considering offers good value for its price.
Warranty and Brand Reputation:
- Consider the warranty offered. A good warranty can add value to your purchase, especially at higher price points.
- Established brands often have better customer service and warranty support.
Second-Hand Options:
- For premium packs, sometimes you can find second-hand options in good condition, especially if you’re part of hiking or biking clubs and communities.
Cost of Additional Accessories:
- Factor in the cost of any additional accessories you might need to purchase, like a better bladder, cleaning kits, or a rain cover.
When setting your budget, it’s important to balance cost with the quality and features you need. Investing a bit more in a hydration pack can sometimes mean a more comfortable, functional, and durable product, which can be a smarter long-term investment, especially if you’re a frequent user.
11) Read Reviews

Reading reviews is a vital step in selecting the right hydration pack. Reviews can provide real-world insights into a product’s performance, durability, and suitability for specific activities. Here’s how to make the most of reviews when choosing a hydration pack:
1. Sources of Reviews:
- Online Retailers: Websites like Amazon, REI, and Backcountry often have user reviews. Pay attention to both positive and negative reviews for a balanced view.
- Specialized Forums and Blogs: Websites focused on outdoor activities, running, cycling, or specific sports often have detailed reviews and user experiences.
- Social Media and YouTube: Platforms like Instagram and YouTube can be sources of reviews, often more visual and detailed about specific features and performance.
2. What to Look For in Reviews:
- Comfort and Fit: Are there repeated comments about the pack being comfortable or causing discomfort? Look for mentions of chafing, strap comfort, and load distribution.
- Durability: Do users report the pack lasting a long time, or are there issues with wear and tear? This is crucial for gauging the pack's quality over time.
- Functionality in Practice: How well does the pack perform in the environment it’s designed for? Look for comments on its use during specific activities like hiking, running, biking, etc.
- Hydration System: Focus on what reviewers say about the bladder, ease of drinking, leakage issues, and ease of refilling.
- Capacity and Storage: Does the actual storage capacity match what’s advertised? Are there enough pockets and are they well-placed?
- Weight: Is the pack heavier or lighter than expected? How does its weight affect the user experience?
- Ease of Cleaning: Look for comments on how easy it is to clean and maintain the pack and its hydration system.
3. Analyzing Reviews:
- Quantity and Quality of Reviews: A product with hundreds of reviews is generally more reliable than one with just a handful. However, quality detailed reviews can be more informative than a large number of vague or short ones.
- Recency of Reviews: Pay attention to the dates of reviews. Products can change over time, so recent reviews will be more accurate.
- Verified Purchase Reviews: These reviews are more likely to be genuine as they come from confirmed buyers.
4. Comparative Reviews:
- Head-to-Head Comparisons: Some reviewers compare different brands and models directly against each other, which can be very helpful in making a decision.
- Video Reviews: These can provide a more in-depth look at the pack, showing it in use and giving a better sense of size, fit, and features.
5. Professional and User Reviews:
- Professional Reviews: These are often more detailed and test the packs under a variety of conditions. They can provide a more technical perspective.
- User Reviews: These offer a personal perspective and can highlight issues or benefits that might not be apparent in professional reviews.
6. Understanding Biases:
- Be aware of potential biases in reviews. Some might be sponsored or influenced by brand partnerships. Independent reviews tend to be more reliable.
7. Common Issues and Deal Breakers:
- Look for any recurring issues mentioned in multiple reviews, as these could be deal-breakers.
Reading reviews requires a bit of time and critical thinking, but it’s a valuable step in ensuring you choose a hydration pack that meets your needs and expectations. Remember, no product is perfect, and minor negative points might be tolerable depending on your personal priorities and requirements.
12) Try Them On
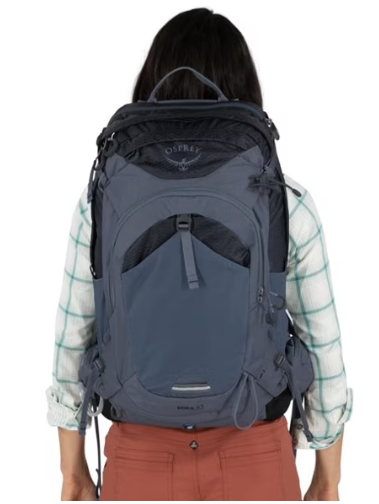
Trying on different hydration packs before making a purchase is a crucial step, especially if comfort, fit, and functionality are your top priorities. Here’s how you can make the most out of the process of trying them on:
1. Where to Try Hydration Packs:
- Outdoor Retail Stores: Specialty outdoor and sporting goods stores often have a variety of hydration packs you can try on. Staff at these stores can also provide valuable advice and assistance.
- Events and Expos: Outdoor events, races, and expos often have booths from different manufacturers where you can try on packs.
- Rent or Borrow: If possible, rent or borrow a pack for a day to get a real feel for how it performs in action.
2. What to Look For While Trying On:
- Fit and Comfort: Pay attention to how the pack fits your body. Check for any pressure points, how the weight feels on your back, and whether the straps are comfortable.
- Adjustment Options: Experiment with all the adjustable straps and features to see how well you can tailor the fit to your body.
- Ease of Access: Check how easy it is to access the reservoir, pockets, and other compartments.
- Stability: Move around with the pack on. Jump, lean forward, and mimic the movements of your intended activity to test the pack’s stability.
- Ventilation: Notice if there’s enough airflow between your back and the pack.
3. Simulating Load:
- Weight Test: Load the pack with weights (many stores provide weighted bags for this purpose) to simulate how it feels when full. This helps assess the distribution and handling of the load.
- Water Simulation: If possible, try the pack with water in the reservoir. This not only adds weight but also allows you to test the hydration system’s ease of use.
4. Consulting with Sales Associates:
- Take advantage of knowledgeable staff at outdoor or sports stores. They can provide insights on the pack’s features, fit adjustments, and suitability for different activities.
5. Checking Different Models and Brands:
- Try a variety of models and brands to compare. Even within the same brand, different models can have significant variations in fit and features.
6. Wearing Appropriate Clothing:
- Wear the type of clothing you would typically wear during your activity. If you plan to use the pack for winter hiking, for instance, thicker clothing will affect how the pack fits.
7. Look for Return Policies:
- If trying in-store isn’t an option, purchase from a retailer with a good return policy. This way, you can test the pack during a real activity and return it if it doesn’t meet your needs.
8. Noting Down Impressions:
- Keep notes on what you liked and didn’t like about each pack. This can help in making a final decision, especially if you’re trying out several options.
9. Consider Future Needs:
- Consider not just your current needs but also how you might use the pack in the future. Will you need more space for longer trips, or are you planning to reduce your load?
10. Personal Preferences:
- Pay attention to your personal preferences in terms of style, color, and design. While these are secondary to function and comfort, they are still important for your overall satisfaction.
Trying on different hydration packs provides you with firsthand experience of the product and helps ensure you select a pack that is comfortable, functional, and enjoyable to use. This step is particularly important for those who plan to use their pack frequently or for extended periods.
Conclusion
Selecting the right hydration pack is a balance of personal preference, intended use, and practical features.
To make the best choice, consider the capacity you need, the fit and comfort of the pack, the ease of filling and cleaning, the durability of the materials, and any additional storage space for essentials.
Remember, a good hydration pack not only keeps you hydrated but also enhances your outdoor experience, whether you're hiking, biking, or running.
Ultimately, the right hydration pack should feel like a natural extension of your gear, seamlessly integrating into your adventures while keeping you refreshed and focused on the trail ahead.
